My Tips On Caring For A Crispy Wave Fern (Asplenium Nidus)
Caring for a Crispy Wave Fern can sometimes feel like you’re trying to keep a finicky celebrity happy.
Warm? Check. Humid? Double-check. But don’t let its seemingly high-maintenance vibe scare you off.
I’ve got the lowdown on how to keep your Crispy Wave Fern not just alive, but thriving.
Trust me, it’s easier than it sounds, and the payoff? A lush, vibrant plant that adds a touch of the tropics to any room.
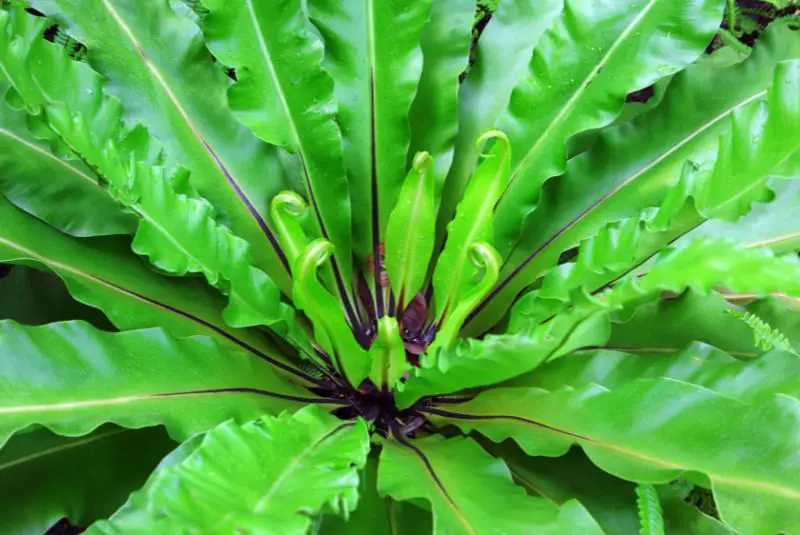
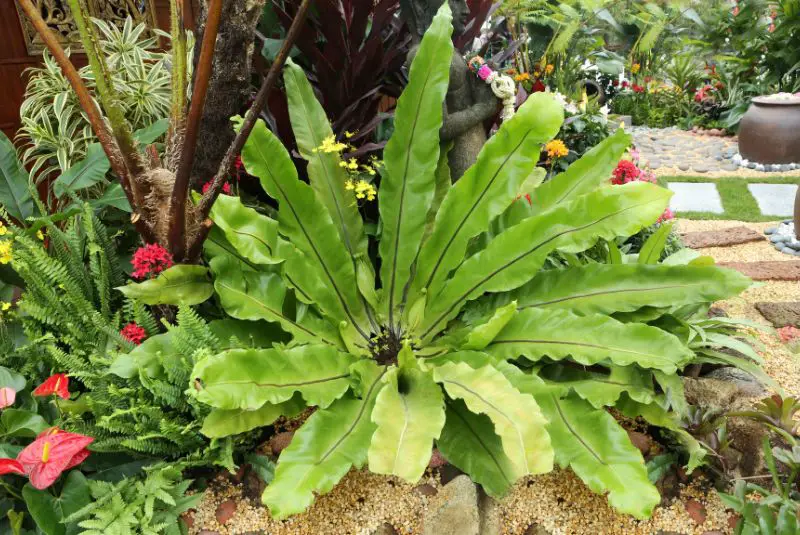
This little green diva, officially known as the Asplenium nidus, hails from the steamy climates of Asia, Australia, and Africa.
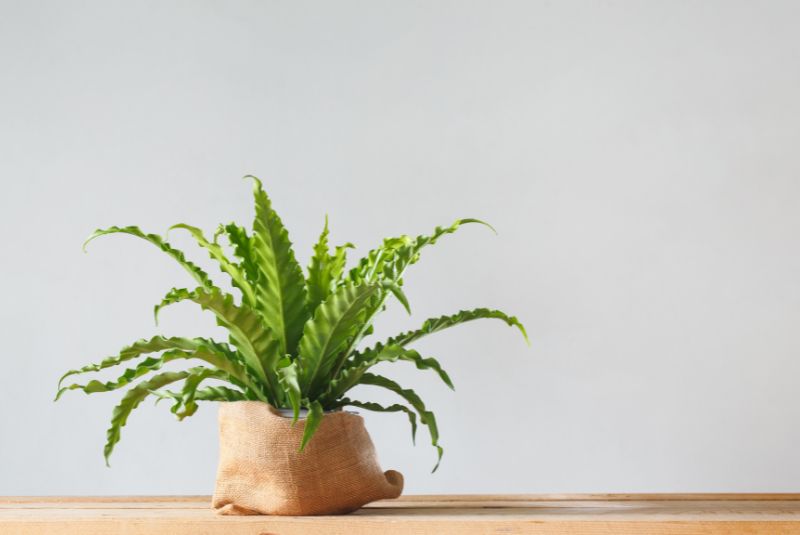
It’s got a flair for drama with its glossy, wave-like fronds that can make any plant parent proud. But here’s the twist: despite its exotic looks, the Crispy Wave Fern is surprisingly down to earth when it comes to its care.
Stick with me, and I’ll guide you through the essentials of keeping your fern looking its Instagram-worthy best, from the right lighting to the perfect watering schedule.
Optimal Lighting for Crispy Wave Fern
Finding that perfect light for your Crispy Wave Fern isn’t as tricky as it might sound.

Determining the Best Light Exposure
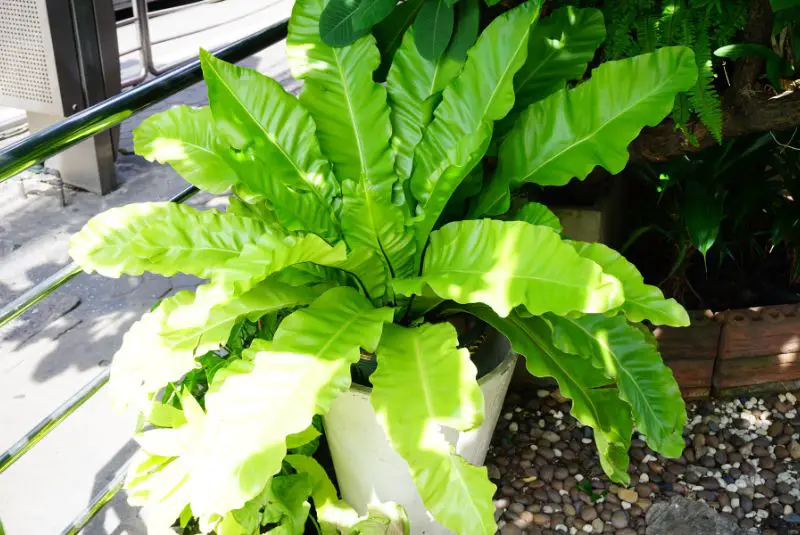
When it comes to the Crispy Wave Fern, moderate indirect light strikes the right balance.
These plants thrive under the canopy of trees in their natural habitat, which means they’re used to getting dappled sunlight rather than direct rays.
A spot where the light is bright but filtered works wonders.
This could be a few feet away from a north or east-facing window.
Such positioning ensures your fern gets the light it needs without the harshness of direct sunlight, which can burn its leaves.
Adjusting Light Conditions Seasonally
Seasonal changes affect the intensity and duration of sunlight entering our homes, and it’s essential to adjust your fern’s exposure accordingly.
During the brighter months, ensure your Crispy Wave Fern is not exposed to too much light by either moving it further away from the window or using a sheer curtain to diffuse direct sunlight.
In contrast, winter months often call for a closer position to the light source to compensate for shorter daylight hours.
Keeping a watchful eye on the light quality throughout the year and making small adjustments ensures your Crispy Wave Fern remains healthy and vibrant.
Proper Watering Techniques for a Healthy Fern
Mastering the right watering techniques is a game-changer for your Crispy Wave Fern. It’s all about finding that sweet spot—not too much, not too little.

How Often to Water Your Crispy Wave Fern
I’ve found that weekly watering strikes the perfect balance for Crispy Wave Ferns. However, this isn’t a set-in-stone rule.
The frequency really ramps up in the summer, thanks to higher temperatures and longer days, requiring a bit more attention to keep the soil evenly moist.
Then, when winter rolls around, I dial it back as the plant’s growth slows and it doesn’t soak up water as quickly.
The key is to check the soil’s moisture level; it should never feel bone dry.
A simple finger test, inserting about an inch into the soil, provides a quick moisture gauge. If it feels dry, it’s time to water; if moist, give it a bit more time.
Tips for Preventing Over-Watering and Under-Watering
First, opt for pots with drainage holes. They are lifesavers, really.
They allow excess water to escape, which is key for preventing water from sitting at the bottom and causing root rot.
If you’re a fan of terracotta pots like me, you’re in luck. They’re excellent at wicking away excess moisture from the soil, further reducing the risk of over-watering.
Then there’s the golden rule: never let your fern sit in water. After watering, I always check the saucer beneath the pot a few minutes later, pouring away any standing water.
It’s an easy step that makes a big difference.
On the flip side, to prevent under-watering, remember that these ferns love humidity. I keep a close eye on my plants, especially during dry spells or if I’ve been cranking up the heat in winter.
If the fern’s leaves start to look a tad crispy or the soil dries out too quickly between waterings, it’s a clear sign it needs a bit more TLC.
Increasing the frequency of light watering can help curb under-watering woes without going overboard.
Soil and Potting Essentials
After nailing the light and watering routine, getting the soil and potting right is your next step to ensure your Crispy Wave Fern thrives.

Selecting the Right Soil Mix
Crispy Wave Ferns aren’t fans of regular potting soil. Why? They need a mix that mimics their natural habitat—light and airy.
I recommend blending a specialty soil designed for epiphytic plants with a bit of perlite or orchid bark.
This creates the perfect balance, allowing for excellent drainage and sufficient aeration around the roots. It’s this setup that prevents root rot and supports healthy growth.
When and How to Repot
Repotting doesn’t follow a strict schedule. Instead, I watch for cues from my fern.
When I see roots poking out of the pot’s drainage holes or notice a slowdown in growth, it’s time.
Typically, this happens every two years, give or take. Repotting in spring offers the perfect timing, allowing the fern to adjust during its natural growth spurt.
Here’s how I do it:
- Choose a pot that’s just one size larger than the current one. Bigger isn’t always better because too much space can lead to waterlogged soil.
- Prepare your soil mix as we discussed earlier.
- Gently remove the fern from its current container, teasing out the roots if they’re densely packed.
- Position the fern in the new pot, adding soil around the sides to secure it in place. Ensure the plant sits at the same depth as it did in its previous pot.
- Water lightly to settle the soil, avoiding the temptation to flood the new environment.
Maintaining Ideal Humidity and Temperature
After ensuring your Crispy Wave Fern gets the right kind of light and sits in the perfect soil mix, the next step is getting the humidity and temperature just right.

Creating a Humid Environment
Crispy Wave Ferns absolutely love moisture in the air; they flourish in it. Aiming for a humidity level of 60-90% might sound like a lot, but it’s pretty doable with a few tricks.
The easiest method is using a humidifier nearby, which directly controls the humidity level around your fern.
For a more DIY approach, I favor placing the fern in a pebble tray filled with water. As the water evaporates, it increases the moisture in the air right around your plant.
Plus, it looks pretty cool. Another simple technique is to mist your fern regularly. Just make sure you’re using tepid water to mimic the plant’s natural habitat.
These methods help mimic the moist air of a jungle, making your Crispy Wave feel right at home.
Keeping Temperatures Consistent
Crispy Wave Ferns don’t just need the right humidity; they thrive in a consistent temperature range too.
They’re happiest in temperatures between 60-72°F (15-22°C), which thankfully aligns with most comfortable household temperatures.
Make sure to keep your fern away from drafts and direct heat sources like radiators which can create sudden shifts in temperature.
Keeping your home’s temperature stable is key, and luckily, it’s not too hard to achieve.
Just monitor your thermostat settings and maybe adjust them slightly to maintain that ideal range for your fern.
Fertilizing Your Crispy Wave Fern
Caring for a Crispy Wave Fern isn’t just about the right soil and water; it’s also about feeding it right.
Choosing the Right Fertilizer
When it comes to fertilizers, not all are created equal, especially for the Crispy Wave Fern.
This plant thrives on a balanced, liquid fertilizer that’s diluted to half the strength recommended on the package.
Balanced fertilizers, such as a 20-20-20 mix containing equal parts nitrogen, phosphorus, and potassium, support uniform growth without overwhelming your fern.
It’s important to choose a fertilizer designed for houseplants or, better yet, specifically formulated for ferns to ensure your Crispy Wave gets the nutrients it needs without the risk of chemical burn.
Fertilizing Schedule and Amount
Timing is everything with fertilizing your Crispy Wave. Fertilize monthly from April to September, aligning with the fern’s active growth period.
During these warmer months, the plant is more capable of absorbing and utilizing nutrients efficiently, promoting lush, vibrant fronds. A
void fertilizing from November to February, as this is when your fern enters a dormant phase and doesn’t need extra nutrients.
As for the amount, remember less is more. Overfertilizing can harm your Crispy Wave, leading to yellow leaves or dry tips.
Ensure you dilute your chosen fertilizer to half strength, providing just enough nourishment without the risk of toxicity.
This gentle approach supports healthy growth while protecting your fern from potential fertilizer-related stress.
Pruning and Cleaning for Aesthetic Appeal
Keeping your Crispy Wave Fern looking its best not only enhances your space but promotes healthy growth too.
How to Prune Your Fern Safely
First, you’ll need a pair of clean, sharp scissors or pruning shears. Sterilizing your cutting tools before use minimizes the risk of introducing pathogens to your plant.
Look for any brown or wilted leaves that detract from the plant’s appearance.
Clip these leaves at the base, close to the soil line, ensuring you do not harm the healthy parts of the plant.
Regular pruning encourages the fern to redirect energy toward new growth, keeping it lush and full.
Cleaning Dust and Debris from Fronds
Fronds can collect a surprising amount of dust, which, if left unattended, hampers photosynthesis and the plant’s overall health.
Cleaning your Crispy Wave Fern fronds is simple and effective with just a soft, damp cloth. Gently wipe each frond, supporting it with one hand to avoid damage.
Start from the base of the frond and move outward to the tip, cleaning both the top and bottom surfaces.
If your fern is particularly dusty or hasn’t been cleaned in a while, consider giving it a lukewarm shower.
Letting water gently cascade over the fronds removes dust and refreshes the plant without harsh chemicals.
Ensure good drainage to prevent water from collecting in the crown or base, as this can lead to rot.
Regular pruning and clean fronds not only keep your Crispy Wave Fern visually appealing but also support its health, allowing for efficient photosynthesis and growth.
It’s a simple routine that goes a long way in maintaining the beauty and vitality of your indoor garden addition.
Troubleshooting Common Issues
Caring for a Crispy Wave Fern involves avoiding common pitfalls that can affect its health. Being aware of how to tackle these can make all the difference.
Addressing Yellowing Leaves
When my Crispy Wave Fern begins to show yellow leaves, I take it as a sign I need to evaluate its care routine. Often, yellowing leaves are a symptom of overwatering or poor drainage.
Ensuring the soil is well-draining and not soggy is key. If I find the soil moisture balance challenging to maintain, I adjust my watering schedule or check if the pot’s drainage system is adequate.
Another culprit could be too much direct sunlight. These ferns revel in moderate, indirect light, so I make sure it’s placed where the sun isn’t too harsh.
A lack of nutrients can lead to yellow leaves. I use a balanced, diluted fertilizer every fortnight during its growing season to keep its nutrition on point.
Correcting these aspects typically restores the vibrant green color of the leaves.
Handling Pests and Diseases
Pests and diseases rarely trouble my Crispy Wave Fern, but vigilance is key. I keep an eye out for common pests like spider mites and mealybugs, which thrive in dry conditions.
Increasing humidity around the plant helps prevent these pests. For infestations, I opt for insecticidal soap or neem oil treatments, true lifesavers that are gentle on the fern while effective against pests.
- MULTI-PURPOSE BUG KILLER – Bonide Neem Oil is a perfect pest control solution for any garden dealing with mites, flies, mildew, and more. This product is a three-in-one fungicide, miticide, and insecticide.
- READY TO USE – This product is conveniently ready to use when it arrives. The spray nozzle makes this product easy to deploy and can even be used up to the day of harvest.
- KILLS ALL STAGES OF INSECTS – Bonide’s 3-in-1 Neem Oil is great because it kills the egg, larvae, and adult stages of insects while also preventing the fungal attack of plant tissues.
- DORMANT SPRAY – In addition to being useful for ridding your garden of insects and other pests, this Neem oil makes a great dormant spray to help protect your plants throughout all seasons.
- FOR ORGANIC GARDENING – Derived from the Neem seed, our product is great for use on roses, flowers, vegetables, fruits, herbs, indoor houseplants, trees and shrubs. It’s approved for organic gardening.
Last update on 2025-01-14 / Images from Amazon Product Advertising API
Diseases like root rot can occur due to overwatering. I ensure the soil is airy and moist, not wet.
Proper air circulation around the plant is also essential to prevent fungal diseases.
Propagation of Crispy Wave Fern
Starting a new Crispy Wave Fern from scratch isn’t exactly a walk in the park, but with the right steps, it’s definitely doable.
Step-by-Step Propagation Guide
1. Collect Spores: This step feels a bit like a science project. You’ll need to wait until the fern produces spore casings on the underside of its leaves. Once you see them, gently scrape these casings off with a knife and collect them in a paper bag. Give them a week in there; they’ll release the spores on their own.
2. Prepare Your Materials: You’ll need a shallow propagation tray and some high-quality, fine potting mix. Sterilize the tray with a bleach solution to ward off any unwanted diseases, then fill it up with your potting mix.
3. Sow the Spores: Take the spores you collected and sprinkle them over the surface of the potting mix. Don’t cover them with soil; they need light to germinate. Mist the surface gently to keep it moist but not soggy.
4. Create a Mini Greenhouse: Cover the propagation tray with a clear plastic lid or wrap it in plastic film. This mini greenhouse effect helps maintain the right humidity and temperature for the spores to germinate.
5. Provide Light and Warmth: Place the tray in an area with bright, indirect sunlight. The ideal temperature for germination is between 70-75°F. Keep an eye on the moisture level and mist the surface as needed to prevent it from drying out.
6. Wait for Germination: This is the part where patience truly becomes a virtue. It can take several weeks to months for the spores to germinate. Once you see tiny ferns starting to grow, you’re on the right track.
7. Transplant the Seedlings: When the ferns are big enough to handle (usually a few inches tall), gently transplant them into individual pots. Keep the soil moist and continue to provide bright, indirect light.
8. Keep Conditions Ideal: From this point on, care for your new Crispy Wave Ferns as you would mature plants. Maintaining humidity, providing the right light, and ensuring the soil is never too dry will help your baby ferns thrive.
Final Thoughts and Additional Care Tips
Caring for a Crispy Wave Fern turns out to be more of a journey than a one-time setup.
Recognizing Signs of Stress in Your Fern
If the fronds start looking sad and yellow or you notice the edges turning brown, your plant’s trying to tell you something.
Often, this means the air is too dry, it’s getting too much direct sun, or you’re either underwatering or overwatering. A
djust your care schedule accordingly, and you’ll likely see your fern perk up in no time.
The Importance of Clean Leaves
Clean leaves are not just about aesthetics; they play a key role in the health of your crispy wave fern.
Dust can block sunlight and clog the pores through which the plant breathes.
Every now and then, give the leaves a gentle wipe with a damp cloth.
This simple step ensures your fern is not just surviving but thriving by maximizing its photosynthesis capabilities.
Seasonal Adjustments in Care
Seasonal changes require adjustments in the care of your crispy wave fern.
As temperatures drop in winter, you might need to reduce watering and ensure the plant is not near cold drafts.
During the warmer months, on the other hand, your fern will appreciate a bit more humidity.
Consider moving it to a bathroom if there’s enough light, or use a pebble tray to increase moisture around the plant.
Dealing with Pests and Diseases
Despite your best efforts, pests and diseases can occasionally trouble your crispy wave fern.
Keep an eye out for common culprits like spider mites and mealybugs.
If you spot any, isolate the fern to prevent spread to your other plants, and treat it with neem oil or a mild soap solution.
- MULTI-PURPOSE BUG KILLER – Bonide Neem Oil is a perfect pest control solution for any garden dealing with mites, flies, mildew, and more. This product is a three-in-one fungicide, miticide, and insecticide.
- READY TO USE – This product is conveniently ready to use when it arrives. The spray nozzle makes this product easy to deploy and can even be used up to the day of harvest.
- KILLS ALL STAGES OF INSECTS – Bonide’s 3-in-1 Neem Oil is great because it kills the egg, larvae, and adult stages of insects while also preventing the fungal attack of plant tissues.
- DORMANT SPRAY – In addition to being useful for ridding your garden of insects and other pests, this Neem oil makes a great dormant spray to help protect your plants throughout all seasons.
- FOR ORGANIC GARDENING – Derived from the Neem seed, our product is great for use on roses, flowers, vegetables, fruits, herbs, indoor houseplants, trees and shrubs. It’s approved for organic gardening.
Last update on 2025-01-14 / Images from Amazon Product Advertising API
Regular inspections are your best defense against these unwelcome guests.
