My Tips On Caring For Your Fittonia Plant
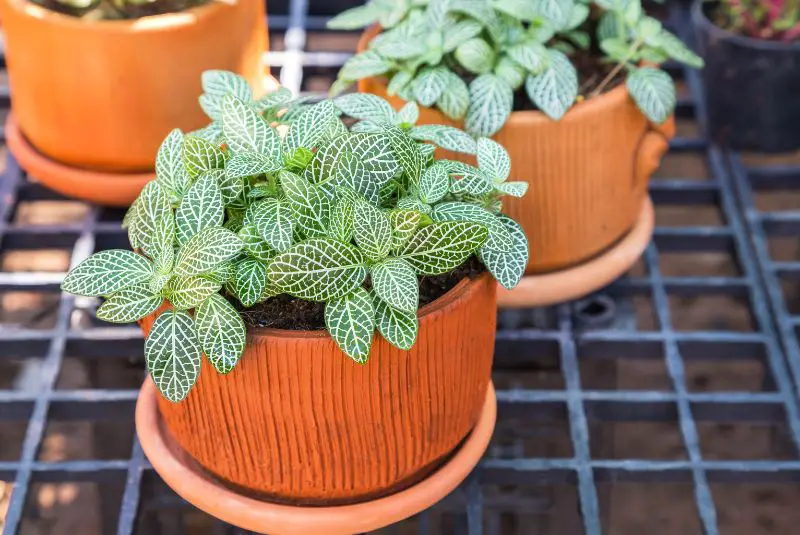
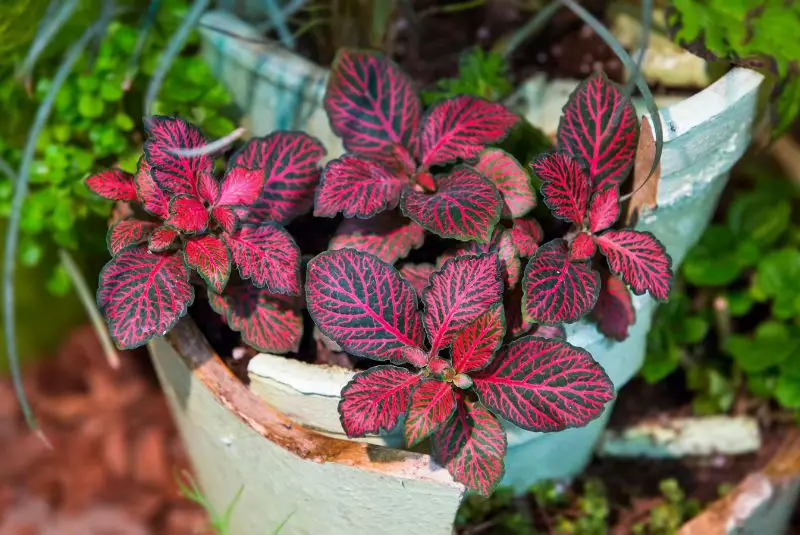
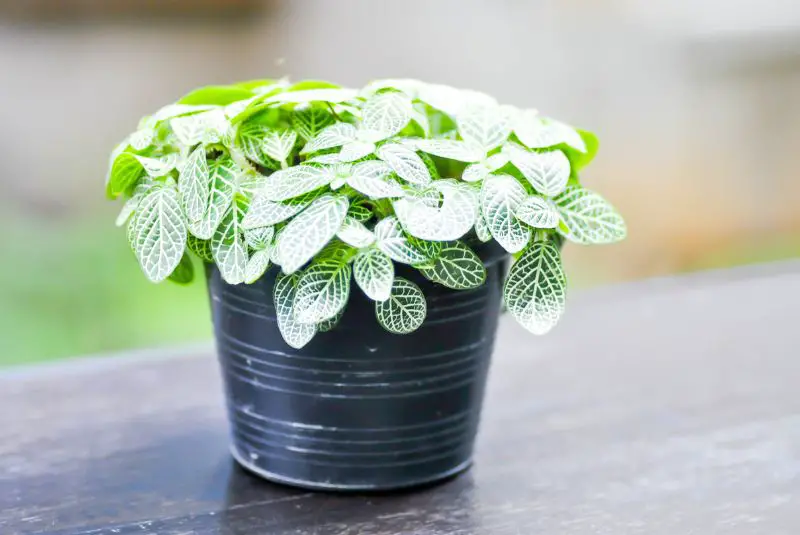
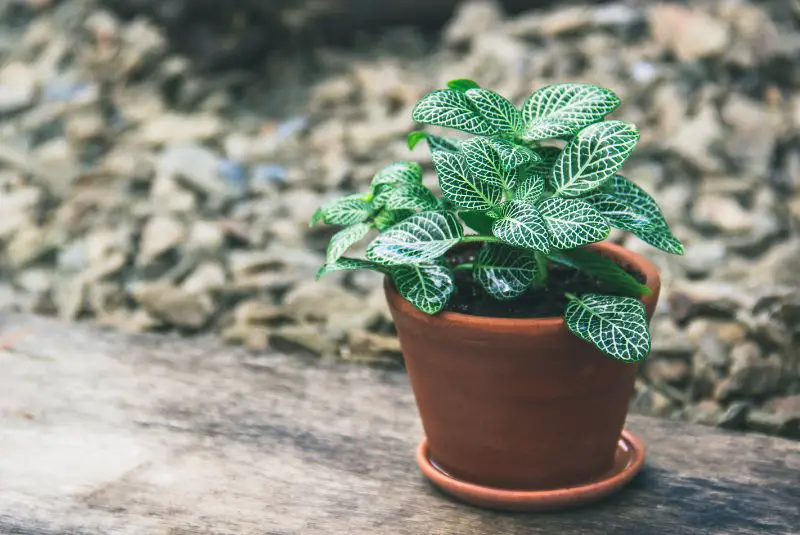
Known affectionately as the nerve plant, this stunner turns any space into a vibrant showcase with its intricate, mosaic-like leaves.
It’s a visual feast, but let’s be honest, keeping a fittonia happy can sometimes feel like decoding an ancient mystery.
Fear not! I’ve ventured through the jungles of houseplant care to bring you the essential tips and tricks for keeping your fittonia not just alive, but thriving.
Think of it as your cheat sheet to bypassing the common pitfalls of indoor gardening. So, if you’re ready to turn your home into a fittonia-filled haven, buckle up!
We’re about to embark on a journey through the do’s and don’ts of nerve plant care.
Essential Materials and Tools for Fittonia Care
When it comes to nurturing fittonia, known for its dazzling foliage, having the right materials and tools at your disposal makes all the difference. I’ll walk you through the essentials, ensuring your nerve plant gets everything it needs to flourish.

Choosing the Right Pot
Fittonia plants thrive in pots with adequate drainage to prevent waterlogging, which can lead to root rot.
Opt for a pot that’s one size larger than the current one if you’re repotting.
This gives your fittonia room to grow without leaving too much soil waterlogged.
Remember, ceramic or terracotta pots are not only visually appealing but also porous, allowing the soil to breathe and reducing the risk of overwatering.
Selecting Soil and Amendments
Fittonia’s root system loves a light, airy soil that retains moisture without becoming soggy.
A premium potting mix designed for houseplants provides a good starting point.
However, to tailor the mix to your fittonia’s needs, consider mixing in amendments like perlite, vermiculite, or coco coir.
These additions improve drainage and aeration, creating an ideal environment for root growth.
Adding a layer of bark can also enhance drainage and mimic the plant’s natural habitat.
Understanding Fittonia’s Environment
Nailing down the environment is key to seeing your fittonia flourish.

Ideal Lighting Conditions
Fittonias bask in bright, indirect light but shy away from the harsh afternoon sun.
A spot near a window that gets filtered light throughout the day works wonders.
If the light’s too intense, a sheer curtain can soften it, providing the perfect balance.
Remember, too little light and your fittonia might start looking a bit leggy, while too much direct sunlight can bleach those gorgeous leaves.
Optimal Temperature Range
These tropical natives enjoy warmth, with their comfort zone hovering between 60-80°F (15-27°C).
They’re not fans of sudden temperature changes, so keep them away from drafty windows and air vents.
If your home tends to run cool, especially during winter months, consider a plant warmer or situate your fittonia in a spot that maintains a stable temperature.
Importance of Humidity
Humidity is like a best friend to fittonias, reminding us of their tropical rainforest origins.
They thrive in environments with high humidity levels, ideally around 60-70%.
Achieving this can be as simple as placing your plant on a tray of wet pebbles or using a room humidifier.
For those looking for an all-in-one solution, terrariums or bottle gardens not only make striking displays but also create the perfect humid haven for fittonias to thrive.
Watering Your Fittonia
Watering fittonia isn’t tough, but it does require a bit of finesse to get it just right. The trick is to keep the balance—ensuring the soil stays moist without heading into soggy territory.

Checking Soil Moisture Before Watering
I’ve found sticking my finger about an inch deep into the soil works best.
If the top inch feels dry, it’s time to water. This simple step prevents over-enthusiastic watering, keeping your fittonia from the dreaded root rot.
Tips for Proper Watering Technique
When it comes time to actually water your fittonia, opting for room temperature water mirrors their tropical origins and prevents shock to the delicate roots.
I always water thoroughly but gently around the base of the plant, ensuring the water gets evenly distributed.
After watering, I let any excess water drain away—it’s okay to be thorough but being mindful to avoid waterlogging is key.
I’ve noticed during warmer months my fittonia thirsts more frequently, sometimes needing water more than once a week.
Conversely, in cooler months, the watering schedule can be dialed back. Adjustments are part of the process, keeping an eye on the plant’s response helps me tweak as needed.
Fertilizing Your Fittonia
Feeding fittonia is a bit like supplying your plant with a well-balanced diet—it’s about giving it the right nutrients at the right time.

Selecting the Right Fertilizer
I recommend going for a half-strength liquid fertilizer that’s balanced. This means looking for something that boasts an equal ratio of nitrogen, phosphorus, and potassium.
These elements support leaf growth, root development, and overall plant health, making them perfect for your fittonia.
You’ll find plenty of houseplant-specialized fertilizers online or at garden centers.
Just make sure to read the labels and choose one that can be diluted to half-strength.
This ensures you won’t overwhelm your fittonia with too many nutrients, which can be just as harmful as not feeding it at all.
Fertilizing Schedule
Timing is everything when it comes to feeding your fittonia. I’ve found that fertilizing once a month during the spring and summer months hits the sweet spot.
This is when your fittonia is in its active growth phase and can make the most of the nutrients you’re providing.
Remember, it’s all about moderation. A balanced liquid fertilizer diluted to half the recommended strength works wonders.
Applying it every 4 to 6 weeks during this period encourages lush, healthy growth without the risk of nutrient burn.
In the fall and winter, I ease up on feeding since the plant’s growth slows down. This seasonal approach keeps my fittonia thriving year-round.
Pruning and Maintenance
Here’s the when and how to prune your fittonia to keep it looking its best.
When to Prune Your Fittonia
The best time to give your fittonia a trim is during its active growth period in spring and summer.
This timing ensures that the plant can recover quickly and push out new growth, leading to a fuller, more vibrant appearance.
If your fittonia starts to look a bit leggy or if you notice any dead or yellow leaves, it’s time to grab your pruning tools.
How to Prune for Health and Fullness
Start by removing any yellow, brown, or damaged leaves with sharp scissors or shears. These cuts prevent disease and redirect the plant’s energy to healthier growth.
To enhance fullness, pinpoint the leggy stems and cut them back to just above a leaf node. This technique stimulates the plant to branch out right below the cut, leading to a more compact shape.
Likewise, if there are any overgrown sections overshadowing smaller leaves, giving them a trim not only balances the plant’s appearance but also ensures that light reaches all parts of the fittonia.
Propagating Fittonia
After mastering the basics of fittonia care and ensuring your plant is thriving, you might find yourself wanting to expand your collection.
Propagation is a straightforward process that lets you grow new plants from the one you already have.
Propagation Through Stem Cuttings
Here’s how I do it: I select a healthy stem, ideally one that’s about 4 to 6 inches long. Making a clean cut just below a leaf node increases the chances of successful rooting.
Nodes are those little bumps on the stem where leaves grow from. I remove the leaves near the bottom of the cutting to ensure they don’t rot when planted or submerged in water.
For soil propagation, I dip the cut end in rooting hormone before planting it in a moist, well-draining potting mix. The rooting hormone isn’t mandatory, but it does help speed up the rooting process.
If I choose water propagation, I simply place the stem in a clear glass filled with water, making sure no leaves are submerged.
Both methods require patience, as roots usually appear in a few weeks. Keeping the cutting in a warm spot with indirect light promotes faster root development.
Propagation by Root Division
Root division is my go-to when my fittonia becomes crowded in its pot or when I want to create multiple plants quickly.
I gently remove the plant from its container and carefully separate the root ball into smaller sections.
Each section should have plenty of roots and at least a couple of shoots to ensure it’ll thrive on its own.
I repot each new plant into its container with drainage holes, using a mixture of potting soil, bark, coco coir, or perlite to enhance drainage.
Keeping the soil moist but not soggy is key until new growth indicates the plant has successfully adapted to its new setting.
Troubleshooting Common Issues
Here’s some of the common issues you might face and find out how to fix them.
Yellowing Leaves
When the leaves on your fittonia start turning yellow, it’s usually a sign that you’re giving it too much water.
Remember, these plants love consistency and balance in soil moisture.
Ensure the pot has good drainage and try to let the top inch of soil dry out a bit before watering again.
Overzealous watering leads to soggy soil conditions, which fittonia roots just can’t handle. Backing off a little on watering should help those yellow leaves from becoming a regular sight.
Leaf Drop
Leaf drop can be a bit alarming, but it’s often a sign that your fittonia isn’t getting enough water or it’s in a drafty spot.
Unlike overwatering, underwatering can cause the plant to conserve its remaining resources, leading to leaves dropping off.
Check the moisture of the soil more frequently, ensuring it remains consistently moist but not waterlogged.
Also, moving your plant to a location without drafts helps stabilize its environment, reducing stress and preventing leaf drop.
Browning Tips and Shriveled Leaves
If you spot crispy, brown tips or leaves that seem to shrivel up, the air around your fittonia is probably too dry.
This plant craves humidity, resembling its native tropical rainforest habitat.
Increase the ambiance around your fittonia by misting the leaves regularly, placing a humidifier nearby, or setting the pot on a tray filled with pebbles and water.
Just make sure the pot isn’t sitting directly in water. Creating a more humid microclimate helps to keep those leaves green and vibrant, avoiding the dreaded browning and shriveling.
Repotting Your Fittonia
Repotting might sound daunting, but it’s a breeze once you’ve got the hang of it.
Signs It’s Time to Repot
You’ll know it’s time when you see roots peeking out of the drainage holes or if water runs straight through the pot, suggesting the soil can’t retain moisture anymore.
Fittonia plants enjoy cozy spaces, so they don’t need frequent repotting—every two years is typically sufficient.
However, keep an eye out for these signs, especially during the spring growth spurt, as that’s the ideal time for a pot upgrade.
Step-by-Step Repotting Guide
- Choose the Right Pot: Go for a container that’s just one size up from the current one. Ensure it has good drainage holes and is no more than 2 inches wider in diameter. Avoid terracotta pots as they can dry out the soil too quickly for fittonias’ liking.
- Prepare Your Potting Mix: Mix fresh houseplant soil with a bit of orchid bark or perlite to improve drainage. Fittonias love well-draining but moist environments.
- Gently Remove the Plant: Loosen the soil around the edges of the current pot and gently ease your fittonia out. Be mindful of the roots to avoid unnecessary stress.
- Trim If Necessary: Take a moment to trim off any dead roots with sterile scissors. This keeps your plant healthy and ready for new growth.
- Replant: Place your fittonia in the new pot, filling in around it with your prepared potting mix. Make sure the plant sits at the same depth as in its previous pot to avoid burying the stems.
- Water and Place: Give your newly potted fittonia a good drink and place it back in its spot. Fittonias prefer bright, indirect light, so make sure it continues to get the right amount of sunlight.
Common Pests and Diseases
Dealing with pests and diseases is a part of keeping fittonia plants healthy.
Identifying Common Pests
The most frequent unwelcome guests on fittonia include fungus gnats, mealy bugs, and aphids. Recognizing these pests early is key to managing them effectively.
Fungus gnats are tiny, fly around the soil, and are a sign of overwatering.
Mealybugs look like small cottony dots nestled in the crevices of your plant, and aphids usually gather in clusters under the leaves or on new growth.
Thankfully, catching these pests early means you can save your fittonia from significant damage.
Preventing and Treating Diseases
Overwatering is a common mistake that can lead to root rot, indicated by yellowing leaves. To avoid this, ensure your pot has drainage holes and dial back on the watering.
For pest infestations, neem oil is my go-to solution. It’s effective, natural, and safe for your plant—as long as you dilute it properly.
- MULTI-PURPOSE BUG KILLER – Bonide Neem Oil is a perfect pest control solution for any garden dealing with mites, flies, mildew, and more. This product is a three-in-one fungicide, miticide, and insecticide.
- READY TO USE – This product is conveniently ready to use when it arrives. The spray nozzle makes this product easy to deploy and can even be used up to the day of harvest.
- KILLS ALL STAGES OF INSECTS – Bonide’s 3-in-1 Neem Oil is great because it kills the egg, larvae, and adult stages of insects while also preventing the fungal attack of plant tissues.
- DORMANT SPRAY – In addition to being useful for ridding your garden of insects and other pests, this Neem oil makes a great dormant spray to help protect your plants throughout all seasons.
- FOR ORGANIC GARDENING – Derived from the Neem seed, our product is great for use on roses, flowers, vegetables, fruits, herbs, indoor houseplants, trees and shrubs. It’s approved for organic gardening.
Last update on 2025-04-17 / Images from Amazon Product Advertising API
Apply it to the affected areas, and make sure to isolate your infected fittonia to prevent the pests from spreading to your other plants.
Seasonal Care Tips
As seasons change, so does your approach to keeping these vibrant plants healthy and lush.
Adapting Care in Winter
In winter, Fittonia goes into a semi-dormant state, meaning its growth slows down. I find it key to dial back on watering during these months.
Keep the soil slightly moist, but let the top inch dry out before watering again.
Overwatering in winter is a common pitfall that can lead to root rot, a condition this plant is particularly susceptible to when growth is minimal.
Light becomes a scarce commodity in winter, too. I make it a point to maximize natural light exposure for my Fittonia by placing it near windows that get the most daylight.
However, I’m careful to avoid cold drafts, which can shock these tropical natives. If natural light is insufficient, consider using a grow light to supplement.
A few extra hours of light can make a big difference in keeping your plant vibrant through the darker months.
Adjusting Care in Summer
Summer brings about a significant growth spurt for Fittonia.
During this time, I increase watering to accommodate its accelerated growth needs, ensuring the soil remains consistently moist but not waterlogged.
Summer’s longer days also mean more light, but too much direct sunlight can scorch its delicate leaves.
I position my Fittonia where it receives bright, indirect light, protecting it from the harsh afternoon sun.
Humidity plays a critical role in summer care. Fittonia loves high humidity levels, thriving in conditions that mimic their native jungle habitat.
I frequently mist my plants or use a humidifier to boost moisture in the air, especially when indoor air tends to dry out from air conditioning.
Feeding my Fittonia becomes more frequent in summer, aligning with its peak growth period.
I apply a half-strength liquid fertilizer every 4-6 weeks, providing the nutrients needed for lush foliage without overfertilizing, which can harm the plant.
